Microsoft Dynamics CRM
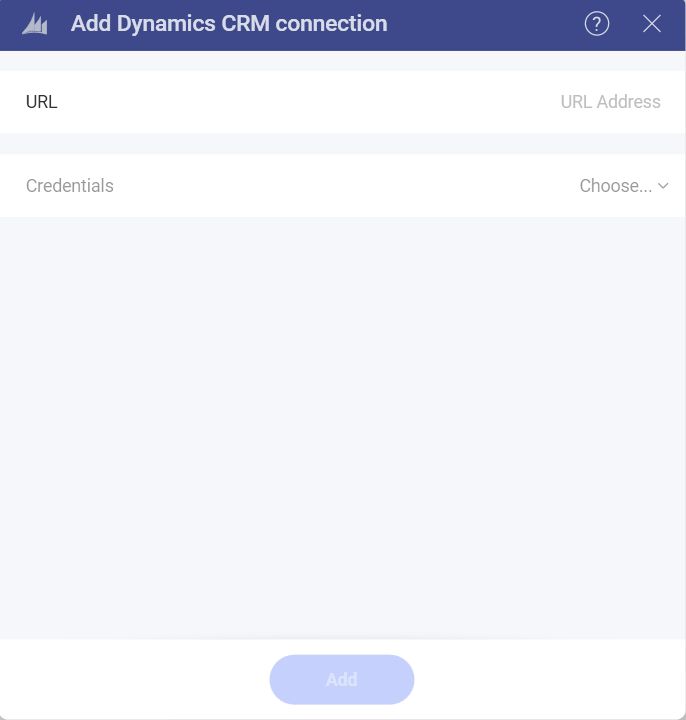
To configure a Microsoft Dynamics CRM data source, you will need to enter the following information:

Default name of the data source: Your data source name will be displayed in the list of accounts in the previous dialog. By default, Analytics names it Microsoft Dynamics CRM. You can change it to your preference.
URL the URL for the Dynamics CRM site (for example, http://crm.YourCompany.local).
Credentials: after selecting Credentials, you will be able to enter the credentials for your Microsoft Dynamics CRM site or select existing ones if applicable.
Username: the user account for the Dynamics CRM website or the name of the domain.
Password: the password for the Dynamics CRM website.
Alias: the name for your data source account. It will be displayed in the list of accounts in the previous dialog.
Once ready, select Add.
Setting Up Your Data
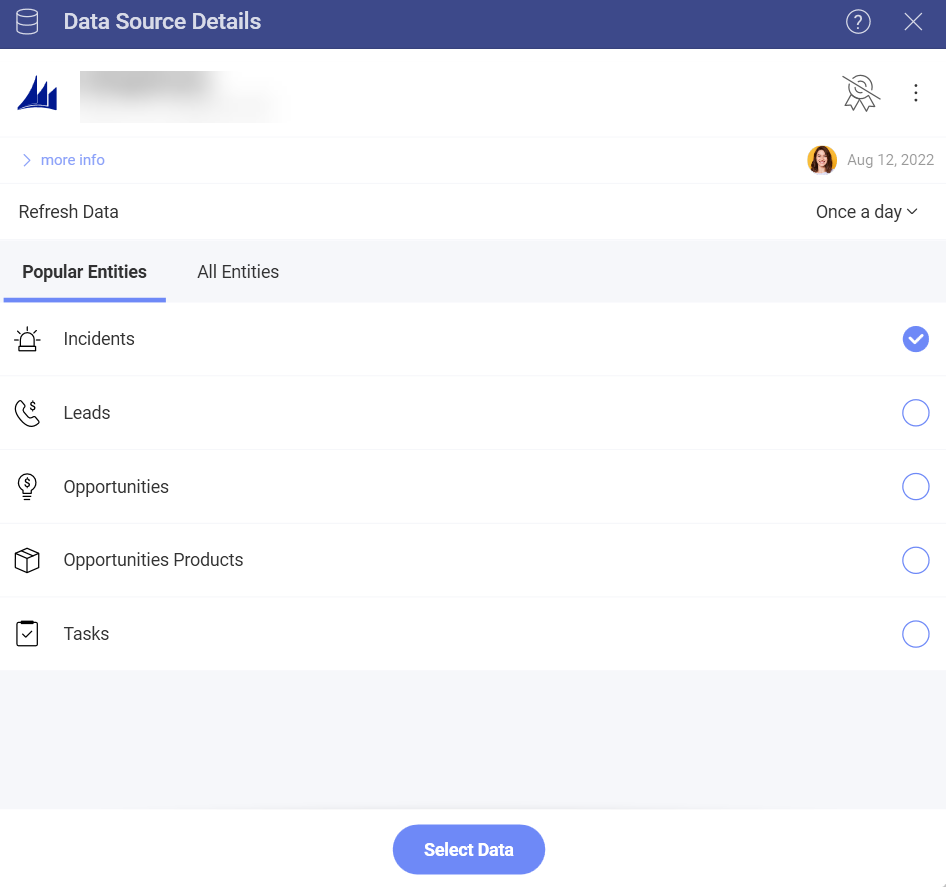
After logging in, you can set up your Microsoft Dynamics CRM data in the following dialog:

Here you can choose the Microsoft Dynamics CRM entities you need from:
Popular Entities - this category allows quick selection between the most used entities among users.
All Entities- this category displays the full list of entities contained in your Microsoft Dynamics CRM account. You can use the provided search to find quickly the entity you need.
Working in the Visualization Editor
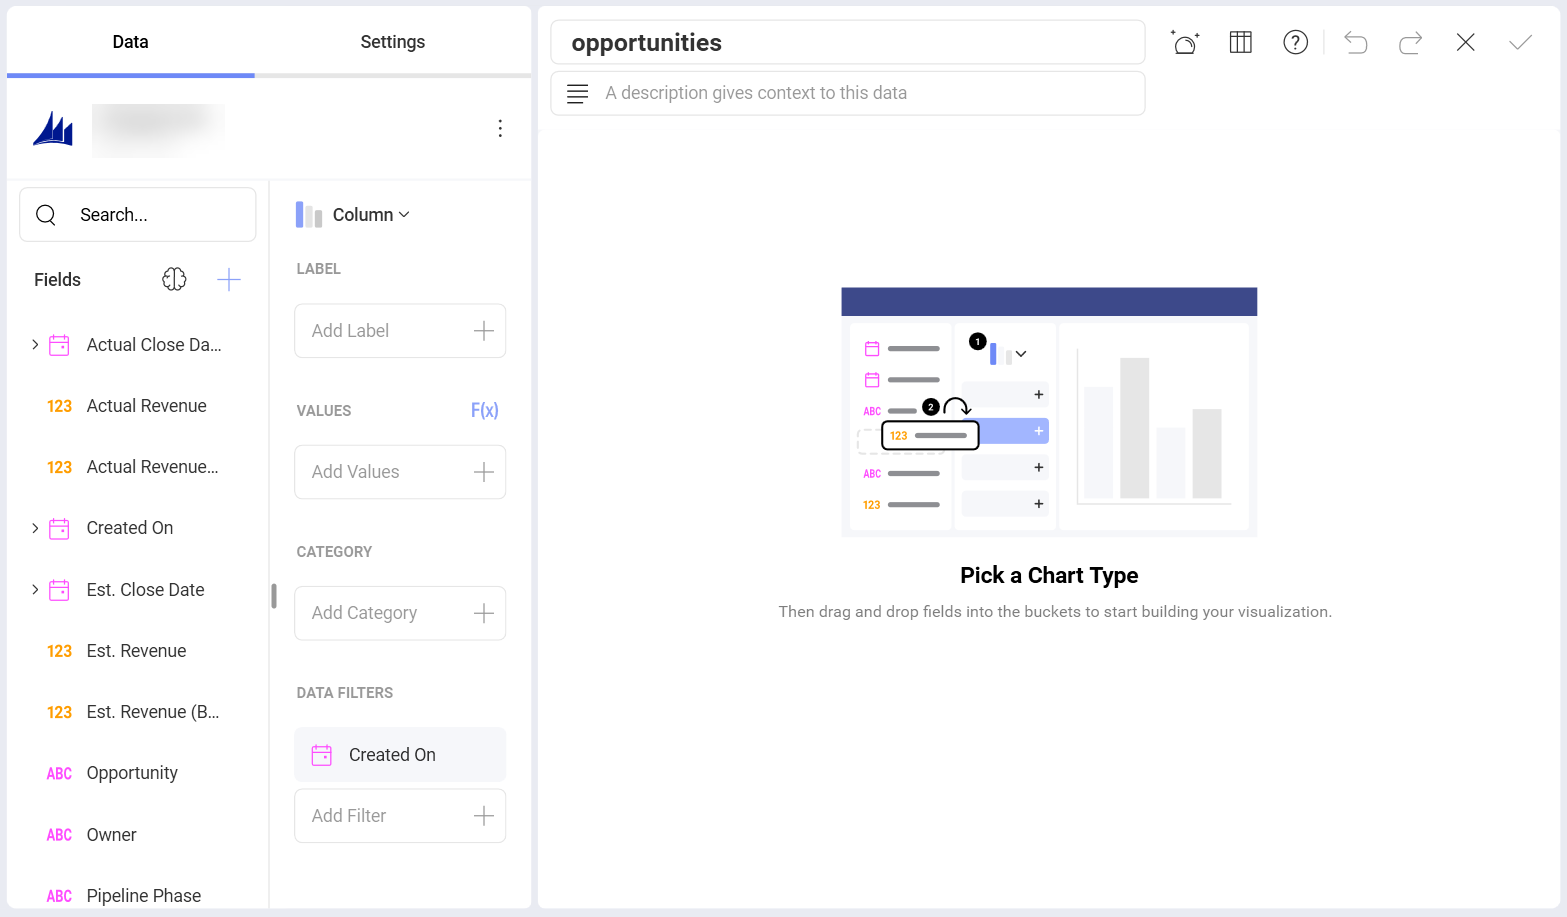
Once you have chosen your entity, you will be taken to the Visualization Editor. Here you can build your dashboard.
By default, the Column visualization will be selected. You can select it in order to choose another chart type.

When you are ready with the visualization editor, you can save the dashboard in My Analytics ⇒ My Dashboards, a project or in a specific workspace by clicking/tapping on the checkmark in the upper right corner.
